[안드로이드] 두번째 스마트폰 "아고라"

코간((Kogan) 테크놀로지스가 두 번째 구글폰인 ‘아고라’와 ‘아고라 프로’를 공개하고 호주에서 온라인 예약판매에 들어갔다고 한다.

2.5인치 터치스크린 LCD가 탑재된 ‘아고라’는 QWERTY 키보드, 마이크로SD 슬롯, 블루투스 2.0 등이 지원되고 200만화소 카메라를 장착하고 있으며, WIFI와 GPS 기능도 있다고 한다.

구글 검색을 비롯해 G메일, 유튜브 동영상 플레이어, 구글 맵스 등 구글의 각종 서비스를 편리하게 이용할 수 있다. ‘아고라’와 ‘아고라프로’의 가격은 각각 194달러, 399달러로 예상되고, 내년 1월 29일 정식 출시될 것이라고 한다. 외형은 블랙베리와 흡사하나 액정화면이 더 큰 것같다.

더 많은 구글 폰이 나오길 기대한다.


Interesting/ANDROID | Posted by hyena0 2008. 12. 4. 23:54

[안드로이드] 컬러 마스크 MASK


[Android] 컬러 마스크 MASK

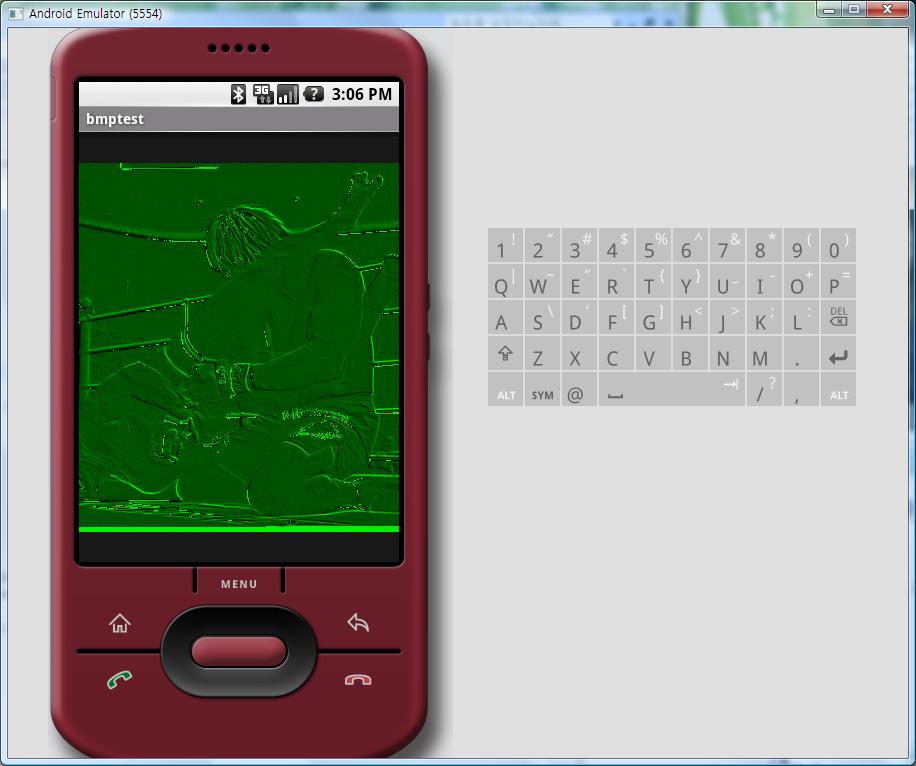
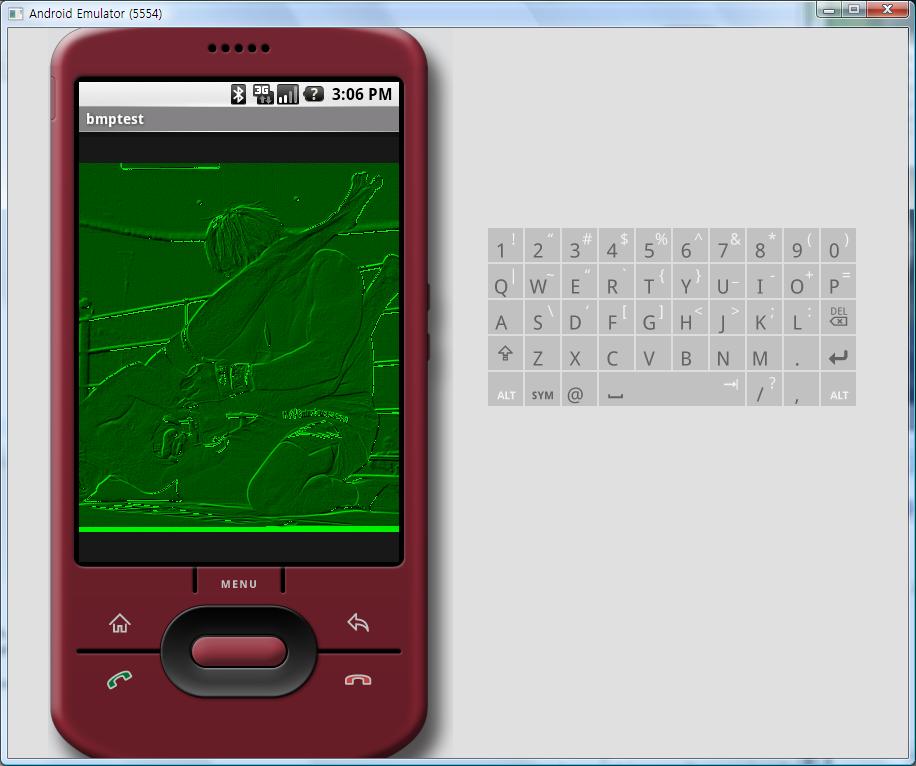
이전에 엠보싱 효과는 녹색에 대해서만 처리할 수 있도록 Mask를 생성했었다.

여러번의 시행착오 끝에 RGB 전체를 MASK 할 수 있게 하는 코드를 작성했다.

MASK 호출 함수에 배열을 너무 크게 생성해 놓으면, 임베디드 디바이스에 적용되는 것이라 그런지 무지하게 느려지는 것을 알 수 있었다.

기존 마스크에 RGB를 구분 할 수 있는 인자를 넣어두고, 호출함수에는 부담을 줄인 뒤 메인함수에서 RGB를 각각 처리하는 방식으로 작성해 보았다.

private int[] mask2Colors(Bitmap bitmapO, int sltColor) {
     int W,H,ST;
     int orgColor=0;
     int greenColor=0;
     //get Height and Width
     H=bitmapO.getHeight();
     W=bitmapO.getWidth();
     ST = W;
     
     int[] colors = new int[ST * H];
     int avrColor=0;
     int[] masks = {1,1,1,1,1,1,1,1,1};//blurring 처리를 위한 배열 1/9 값을 넣어야 하나 1만 넣고 나중에 9를 나눔
    
      int Mh = 3; int Mw =3;
     int var =0;//MASK 계산될 색의 픽셀값
                  
     //get bitmap color
      for (int y = 0; y < H; y++) {
             for (int x = 0; x < W; x++) {
              if(sltColor == 0){// 0 이면 적색
               orgColor = Color.red(bitmapO.getPixel(x, y));
              }
              if(sltColor == 1){// 1 이면 녹색
               orgColor = Color.green(bitmapO.getPixel(x, y));
              }
              if(sltColor == 2){// 2 이면 파란색
               orgColor = Color.blue(bitmapO.getPixel(x, y));
              }
              colors[y * ST + x] = orgColor;
             }
         }
      //calc. average value of colors
     for (int i=0;i<H*W;i++){
      avrColor += colors[i];
     }
     avrColor /= H*W;
     //mask the color
     //i는 계산될 높이 계산될 폭만큼의 반복범위임
     for (int i=0;i<(H-Mh)*(W-Mw);i++){
      
       //mask 계산
        var = colors[i]*masks[0]      + colors[i+1]*masks[1]      + colors[i+2]*masks[2]
             +colors[W+i]*masks[3]    + colors[W+i+1]*masks[4]    + colors[W+i+2]*masks[5]
             +colors[(W+1)+i]*masks[6]+ colors[(W+1)+i+1]*masks[7]+ colors[(W+1)+i+2]*masks[8];
        
        var = var/9; //1/9 효과를 나타냄
        //blur일 경우는 평균값 더하지 않기
        //var +=avrColor;
        colors[i]=var;
        var =0;//var 초기화       
     }
     
     //make argb style
        for (int y = 0; y < H; y++) {
            for (int x = 0; x < W; x++) {
             if(sltColor ==0){// 0 이면 적색
              orgColor = colors[y * ST + x];
              orgColor = orgColor<<16;//red shift
              orgColor = 0x00FF0000 & orgColor;
             }
             if(sltColor ==1){// 1 이면 녹색
              orgColor = colors[y * ST + x];
              orgColor = orgColor<<8;//green shift
              orgColor = 0x0000FF00 & orgColor;
             }
             if(sltColor == 2){// 2 이면 파란색
              orgColor = colors[y * ST + x];
             }
             colors[y * ST + x] = orgColor;
            }
        }
      return colors;
    }

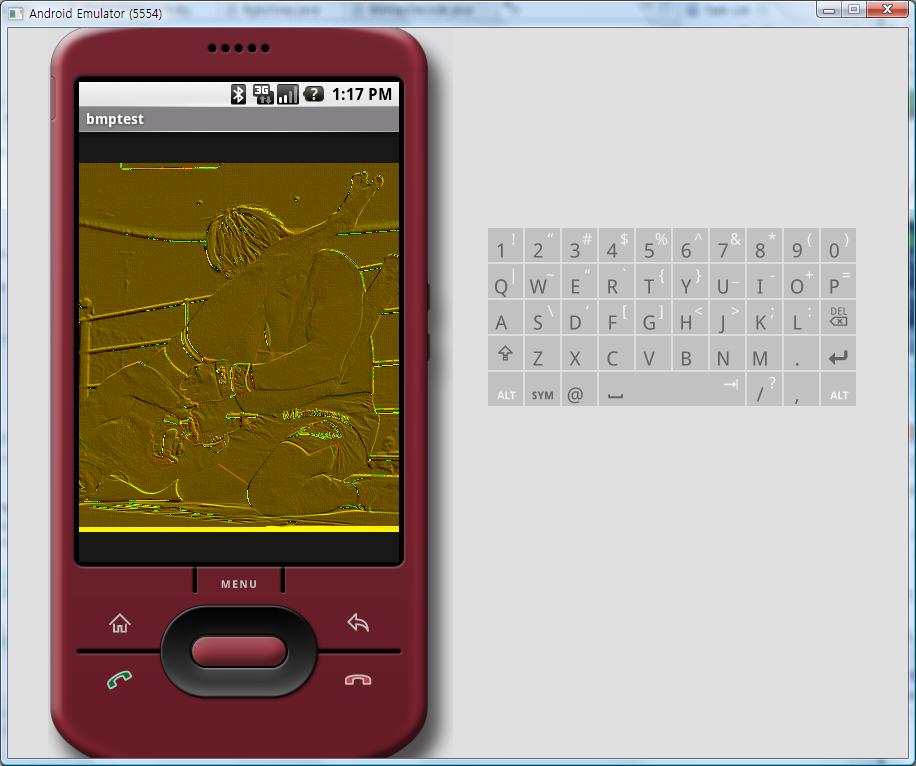
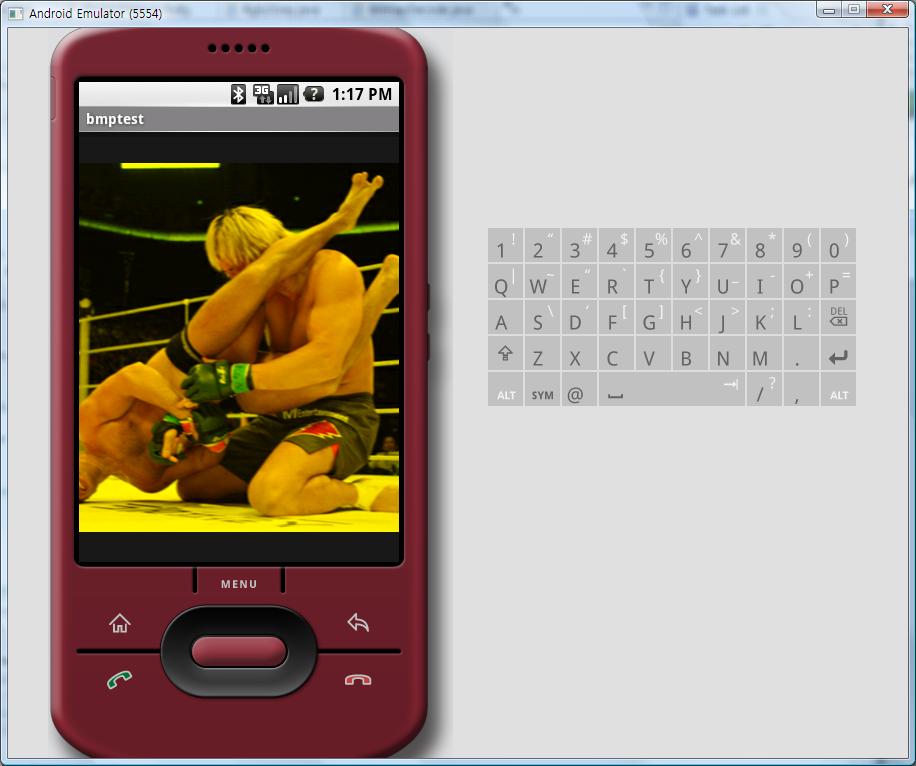
아래는 적용해 본 엠보싱 이미지와 Blurring 이미지 이다. 원본 이미지를 볼려면 여기를 보면 된다.

<<엠보싱>>

<<Blurring>>(3x3)

Interesting/ANDROID | Posted by hyena0 2008. 12. 2. 01:23

[안드로이드] 엠보싱 바로잡기


[Android] 엠보싱효과 바로잡기

이전 포스팅에서 보여주었던 마스크 처리부분에서 엠보싱효과와 샤프닝은 잘못된 결과라는 것을 알게 되었다.
그 이유는 안드로이드에서 제공되는 색의 처리방법이 aRGB라는 방식인데 a는 투명도를 의미하고, R은 적색, G는 녹색, B는 파란색을 의미한다. 색의 값은 16진수로 0xAARRGGBB 가 되고 예로 100%불투명한 적색이라고 하면 0x00FF0000 이 된다. 마스크 방식으로 한 픽셀에 대해 계산하려면 RGB에 대해 각각 처리를 해야 한다. 하지만 기존의 코드에서는 aRGB 값 자체를 계산했기 때문에 거칠은 영상이 만들어졌다.

아래의 수정된 코드로 나온 결과값을 한번 살펴보자.

private int[] maskColors(Bitmap bitmapO) {
     int W,H,ST;
     int orgColor=0;
     int greenColor=0;
     //get Height and Width
     H=bitmapO.getHeight();
     W=bitmapO.getWidth();
     ST = W;
          
     int[] colors = new int[ST * H];
     int avrColor=0;
     //embossing
     //45도  {0,0,-1,0,0,0,1,0,0}
     //90도  {0,-1,0,0,0,0,0,1,0}
     //135도{-1,0,0,0,0,0,0,0,1}
     
      
     int[] masks = {0,0,-1,0,0,0,1,0,};
     //Mask height, width
     int Mh = 3; int Mw =3;
     int var =0;//MASK 계산될 색의 픽셀값
                
     //get bitmap color
        for (int y = 0; y < H; y++) {
            for (int x = 0; x < W; x++) {
             orgColor = bitmapO.getPixel(x, y);
             greenColor = 0x0000FF00 & orgColor; // 녹색에 해당하는 부분을 처리
             greenColor = greenColor>>8; // 마스크 처리를 위해 8비트를 시프트한다.
             colors[y * ST + x] = greenColor;            }
        }
      //calc. average value of colors
     for (int i=0;i<H*W;i++){
      avrColor += colors[i];
     }
     avrColor /= H*W;
     //mask the color
     //i는 계산될 높이 계산될 폭만큼의 반복범위임

     for (int i=0;i<(H-Mh)*(W-Mw);i++){
      
       //mask 계산
        var = colors[i]*masks[0]      + colors[i+1]*masks[1]      + colors[i+2]*masks[2]
             +colors[W+i]*masks[3]    + colors[W+i+1]*masks[4]    + colors[W+i+2]*masks[5]
             +colors[(W+1)+i]*masks[6]+ colors[(W+1)+i+1]*masks[7]+ colors[(W+1)+i+2]*masks[8];
        
        var +=avrColor; //평균값을 더한다.
        colors[i]=var;
        var =0;//var 초기화       
     }
     
     //aRGB 형태로 다시 저장
        for (int y = 0; y < H; y++) {
            for (int x = 0; x < W; x++) {
             greenColor = colors[y * ST + x];
             greenColor = greenColor<<8;
             greenColor = 0x0000FF00 & greenColor;             
             colors[y * ST + x] = greenColor;
            }
        }
      return colors;
    }

이렇게 처리한 결과는 아래와 같이 엠보싱효과를 보인다. 이전 포스팅 결과와 확연한 차이를 보인다.

//45도  {0,0,-1,0,0,0,1,0,0}

//90도  {0,-1,0,0,0,0,0,1,0}

//135도{-1,0,0,0,0,0,0,0,1}