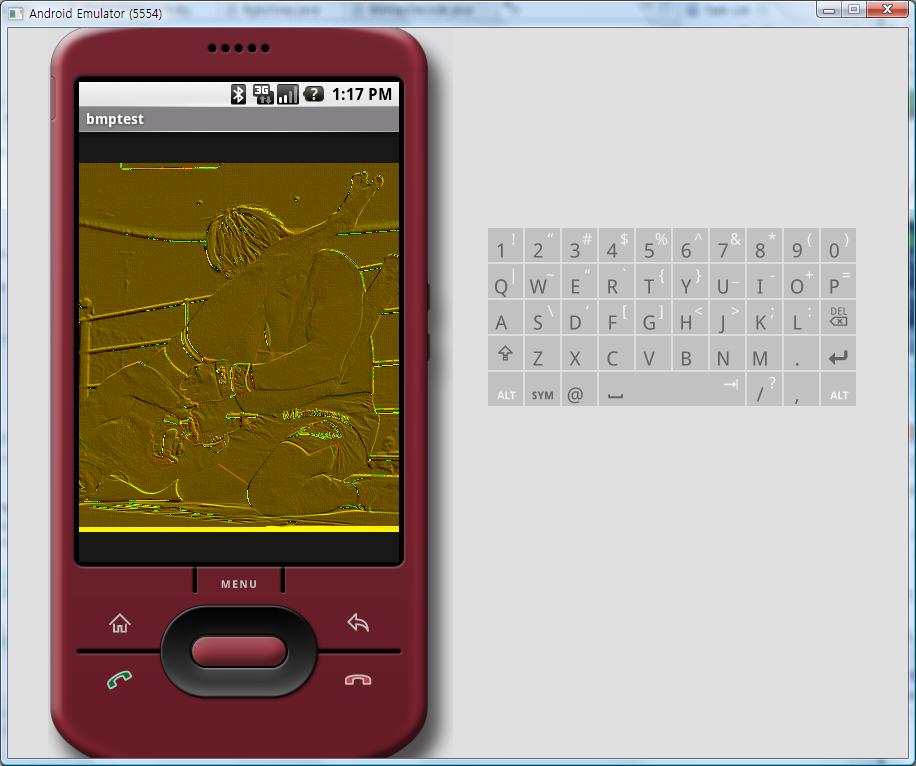
[Android] 컬러 마스크 MASK
이전에 엠보싱 효과는 녹색에 대해서만 처리할 수 있도록 Mask를 생성했었다.
여러번의 시행착오 끝에 RGB 전체를 MASK 할 수 있게 하는 코드를 작성했다.
MASK 호출 함수에 배열을 너무 크게 생성해 놓으면, 임베디드 디바이스에 적용되는 것이라 그런지 무지하게 느려지는 것을 알 수 있었다.
기존 마스크에 RGB를 구분 할 수 있는 인자를 넣어두고, 호출함수에는 부담을 줄인 뒤 메인함수에서 RGB를 각각 처리하는 방식으로 작성해 보았다.
private int[] mask2Colors(Bitmap bitmapO, int sltColor) {
int W,H,ST;
int orgColor=0;
int greenColor=0;
//get Height and Width
H=bitmapO.getHeight();
W=bitmapO.getWidth();
ST = W;
int[] colors = new int[ST * H];
int avrColor=0;
int[] masks = {1,1,1,1,1,1,1,1,1};//blurring 처리를 위한 배열 1/9 값을 넣어야 하나 1만 넣고 나중에 9를 나눔
int Mh = 3; int Mw =3;
int var =0;//MASK 계산될 색의 픽셀값
//get bitmap color
for (int y = 0; y < H; y++) {
for (int x = 0; x < W; x++) {
if(sltColor == 0){// 0 이면 적색
orgColor = Color.red(bitmapO.getPixel(x, y));
}
if(sltColor == 1){// 1 이면 녹색
orgColor = Color.green(bitmapO.getPixel(x, y));
}
if(sltColor == 2){// 2 이면 파란색
orgColor = Color.blue(bitmapO.getPixel(x, y));
}
colors[y * ST + x] = orgColor;
}
}
//calc. average value of colors
for (int i=0;i<H*W;i++){
avrColor += colors[i];
}
avrColor /= H*W;
//mask the color
//i는 계산될 높이 계산될 폭만큼의 반복범위임
for (int i=0;i<(H-Mh)*(W-Mw);i++){
//mask 계산
var = colors[i]*masks[0] + colors[i+1]*masks[1] + colors[i+2]*masks[2]
+colors[W+i]*masks[3] + colors[W+i+1]*masks[4] + colors[W+i+2]*masks[5]
+colors[(W+1)+i]*masks[6]+ colors[(W+1)+i+1]*masks[7]+ colors[(W+1)+i+2]*masks[8];
var = var/9; //1/9 효과를 나타냄
//blur일 경우는 평균값 더하지 않기
//var +=avrColor;
colors[i]=var;
var =0;//var 초기화
}
//make argb style
for (int y = 0; y < H; y++) {
for (int x = 0; x < W; x++) {
if(sltColor ==0){// 0 이면 적색
orgColor = colors[y * ST + x];
orgColor = orgColor<<16;//red shift
orgColor = 0x00FF0000 & orgColor;
}
if(sltColor ==1){// 1 이면 녹색
orgColor = colors[y * ST + x];
orgColor = orgColor<<8;//green shift
orgColor = 0x0000FF00 & orgColor;
}
if(sltColor == 2){// 2 이면 파란색
orgColor = colors[y * ST + x];
}
colors[y * ST + x] = orgColor;
}
}
return colors;
}
아래는 적용해 본 엠보싱 이미지와 Blurring 이미지 이다. 원본 이미지를 볼려면 여기를 보면 된다.
<<엠보싱>>

<<Blurring>>(3x3)


